In the realm of networking and connectivity, category cables reign supreme as the backbone of communication infrastructure. Whether you’re a seasoned IT professional or a DIY enthusiast looking to set up a home network, mastering the art of terminating category cables is a valuable skill. In this comprehensive guide, we’ll walk you through the step-by-step process of terminating a category cable with precision and expertise.
Understanding Category Cables
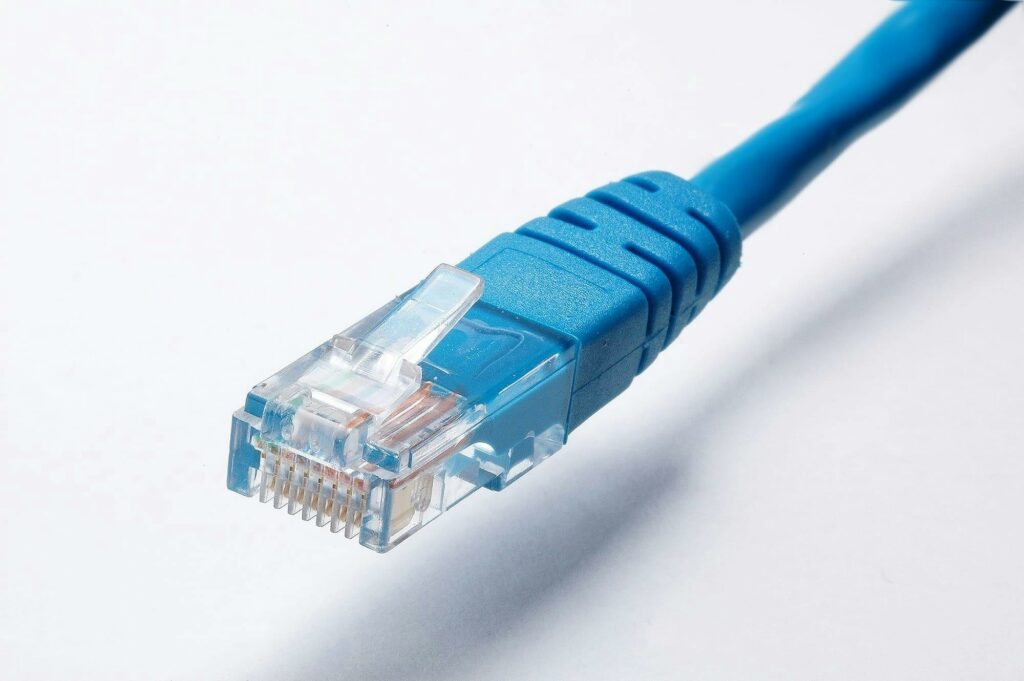
Category cables, commonly referred to as Cat cables, are designed to transmit data reliably over short to medium distances. They come in various categories, including Cat5e, Cat6, and Cat6a, each offering different levels of performance and bandwidth capacity. These cables consist of twisted pairs of copper wires, encased in a protective jacket, and are terminated with RJ45 connectors for Ethernet connectivity.
Tools You’ll Need
Before embarking on the termination process, ensure you have the following tools at your disposal:
- Cable Stripper: Used to strip the outer jacket of the cable without damaging the inner conductors.
- Cable Cutter: Essential for cutting the cable to the desired length.
- Crimp Tool: Employed to attach RJ45 connectors to the stripped cable ends.
- Cable Tester: Verifies the integrity of the terminated cable, ensuring proper connectivity.
Step-by-Step Termination Process
- Prepare the Cable: Begin by stripping approximately 1.5 inches of the outer jacket from the cable end, using the cable stripper. Be careful not to nick or damage the inner wires.
- Untwist and Arrange: Once the outer jacket is removed, untwist the twisted pairs and arrange them according to the desired wiring standard, either T568A or T568B. The color-coding of the wires is crucial for proper termination. T568B is the most common standard you’ll come across, which from left to right is: Orange/White, Orange, Green/White, Blue, Blue/White, Green, Brown/White, Brown. Whichever standard you go with, ensure both ends of the connection are terminated to the same standard. PRO TIP: You can utilize the 1.5 inch jacket you stripped off in step 1 to help untwist the cables. Simply set the edge of the jacket between the 2 twisted wires, so that one wire sits inside the jacket while the other sits outside of it. Then just rotate the jacket down the twist! Fingers saved for another termination!
- Trim and Align: Trim any excess wires to ensure they’re all of equal length and align them neatly in the desired configuration. Proper alignment is essential for ensuring a secure connection. If you’re new to terminating category cables, you can always buy a passthrough crimper and connectors to make trimming the wires down easier. The goal is to maintain the twists in the cable as much as possible and to seat the jacket as far into the connector as possible.
- Insert into Connector: Carefully insert the aligned wires into the RJ45 connector, ensuring each conductor goes into its designated slot. Double-check the alignment to avoid any crossed connections. Remember the order of the wires for T568B/A…face the pins of the connector towards you while inserting the wires, the first wire will go into the far left pin.
- Crimp the Connector: With the wires securely inserted into the connector, use the crimp tool to crimp the connector onto the cable. Apply firm pressure to ensure a tight and reliable connection. If using passthrough tools/connectors, the crimper will cut off any excess wire in this step.
- Test the Connection: Once the connector is crimped, use a cable tester to verify the integrity of the terminated cable. The tester will indicate whether the cable is properly connected and capable of transmitting data without errors.
Conclusion
Terminating category cables may seem daunting at first, but with the right tools and know-how, it’s a skill that anyone can master. By following this step-by-step guide, you can ensure that your network installations are reliable, efficient, and free from connectivity issues. Whether you’re setting up a small home network or a large-scale commercial installation, properly terminated category cables are the key to seamless communication.
So, roll up your sleeves, gather your tools, and embark on the journey of mastering category cable termination. With practice and patience, you’ll soon become proficient in this essential aspect of networking infrastructure.